
Getting started with Webmentions in Gatsby
I have been curious to learn more about webmentions and the IndieWeb for a while now. Putting together my new blog seemed like an excellent opportunity to learn more about it. So keep in mind that I’m pretty new to this stuff, and just sharing my learning process as I go along. This is at least a short tutorial to how to get started with making your site webmentions friendly, how to connect them with twitter, start retrieving them with Gatsby, and how to trigger rebuilds on Netlify when new mentions come in. I’ll revisit how to send them in a later tutorial.
I got started on my webmentions journey by reading Chris’ Building Gatsby Plugin Webmentions and Chad’s Embracing the IndieWeb. Both works were helpful to get started, but they left some details out that may have made it a bit easier to grok. I’ll walk you through all the steps, but do check out their stuff as well.
What is Webmentions?
You can read more about it on the IndieWeb wiki, but shortly put: Webmentions is an open source project and a service to send and receive messages and pingbacks between sites. Like we all did with Wordpress back in the day.
The difference are that Webmentions are federated, meaning that you can collect and send mentions from multiple sources. In this tutorial, I’ll start by pulling in twitter mentions via a service called brid.gy.
How to get started with Webmentions
To get started with Webmentions you need to sign in on webmention.io. And to sign in you need to authenticate. And to authenticate you need to put some markup on your Gatsby site that tells webmention.io which service it can use. As per instructions you can add the following using either Twitter, GitHub, email, your PGP key, or you own IndieAuth server. I added Twitter and Github:
<p>Follow <a class="h-card" rel="me" href="https://www.knutmelvaer.no/">Knut</a> on <a href='https://twitter.com/kmelve' rel='me'>Twitter (@kmelve)</a>, <a href='https://github.com/kmelve' rel='me'>GitHub</a>, or send him an <a class="u-email" href='mailto:knut.melvaer@gmail.com' rel='me'>email</a></p>
So this pretty much looks like your regular piece of HTML. If you look a little closer there is some rel="me" attribute as well as some class names (h-card, u-email). These are microformats (TK), which is an important part of getting webmentions to work. When you publish your site with this markup, you tell webmention that those social accounts are tied to whomever is control of the domain the site is on, and lets you log in via their oAuth-integrations.
As you can see in the figure above, I have a list of webmentions there that you probably don’t have (yet). We’ll return to how to get that list populated with stuff from twitter, but first, we have to add some microformats to our site, to make it webmention friendly.
Adding microformats2 to your posts
Webmentions use a specification called microformats2 to make sense of contents on a webpage. We’ve already started implementing it in the code snippet above. There’s a lot to microformats that I haven’t unpacked for myself yet, but it’s easy enough to get started. You mainly do so by adding some specified class names to HTML elements that have the specific content that webmention use to populate its fields. For example:
<article class="h-card"><header><img class="u-photo" src="http://..."><h1 class="p-name">The Title</h1></header><p class="p-summary e-content">The summary</p><footer><a class="u-url p-name" href="http://...">The author</a></footer></article>
You can use IndieWebify.me or pin13.net to validate your markup. I took a couple of tries for me to get it right. When a webmention service read your page, it will parse the HTML and extract this information into a JSON structure, that may look something like this:
{"items": [{"type": ["h-card"],"properties": {"name": ["The Title","The author"],"summary": ["The summary"],"photo": ["http://..."],"url": ["http://..."],"content": [{"html": "The summary","value": "The summary"}]}}],"rels": {},"rel-urls": {}}
I ended up implementing these “microformated” elements in my post template and hiding them with display: none. Mainly because I didn’t want an ISO8601 formatted datetime stamp visible on the site. I could probably have used a library like date-fns to format the timestamp, but this did the trick without any dependencies. This is for example how it looks in my Gatsby blog’s React code:
<timeclassName={styles.hidden + " dt-published"}itemprop="datepublished"datetime={publishedAt}>{new Date(publishedAt).toISOString().replace('Z', '') + "+01:00"}</time>
Now, let’s head over to the interesting part, namely, getting webmentions into Gatsby.
Installing gatsby-plugin-webmention
The easiest way to get webmentions into a Gatsby site is to install the gatsby-plugin-webmention plugin:
npm install gatsby-plugin-webmention# oryarn add gatsby-plugin-webmention
Now you can add the following config to the plugins array in gatsby-config.js (obviously replacing my information with your own):
{resolve: `gatsby-plugin-webmention`,options: {username: 'www.knutmelvaer.no', // webmention.io usernameidentity: {github: 'kmelve',twitter: 'kmelve' // no @},mentions: true,pingbacks: true,domain: 'www.knutmelvaer.no',token: process.env.WEBMENTIONS_TOKEN}}
The webmentions token is the one that you find under "API key" when you’re logged into https://webmention.io/settings. Remember to also add it to the environment where you build your Gatsby site to production (for example on Netlify). If all went well, you’ll be able to query your webmentions in the Gatsby GraphQL API.
In order to get page specific webmentions I did two things:
- Generate and put the post’s URL into
contextfromgatsby-node.js - Filter the allWebMentionEntry with the URL aka "the permalink"
There’s probably a handful of ways to do this, but I ended up with just generating the full URL in gatsby-node.js, and passing it in via context, so that I could use it as a query param:
postEdges.filter(edge => !isFuture(edge.node.publishedAt)).forEach((edge, index) => {const { id, slug = {}, publishedAt } = edge.nodeconst dateSegment = format(publishedAt, 'YYYY/MM')const path = `/blog/${dateSegment}/${slug.current}/`createPage({path,component: require.resolve('./src/templates/blog-post.js'),context: {id,permalink: `https://www.knutmelvaer.no${path}`}})createPageDependency({ path, nodeId: id })})
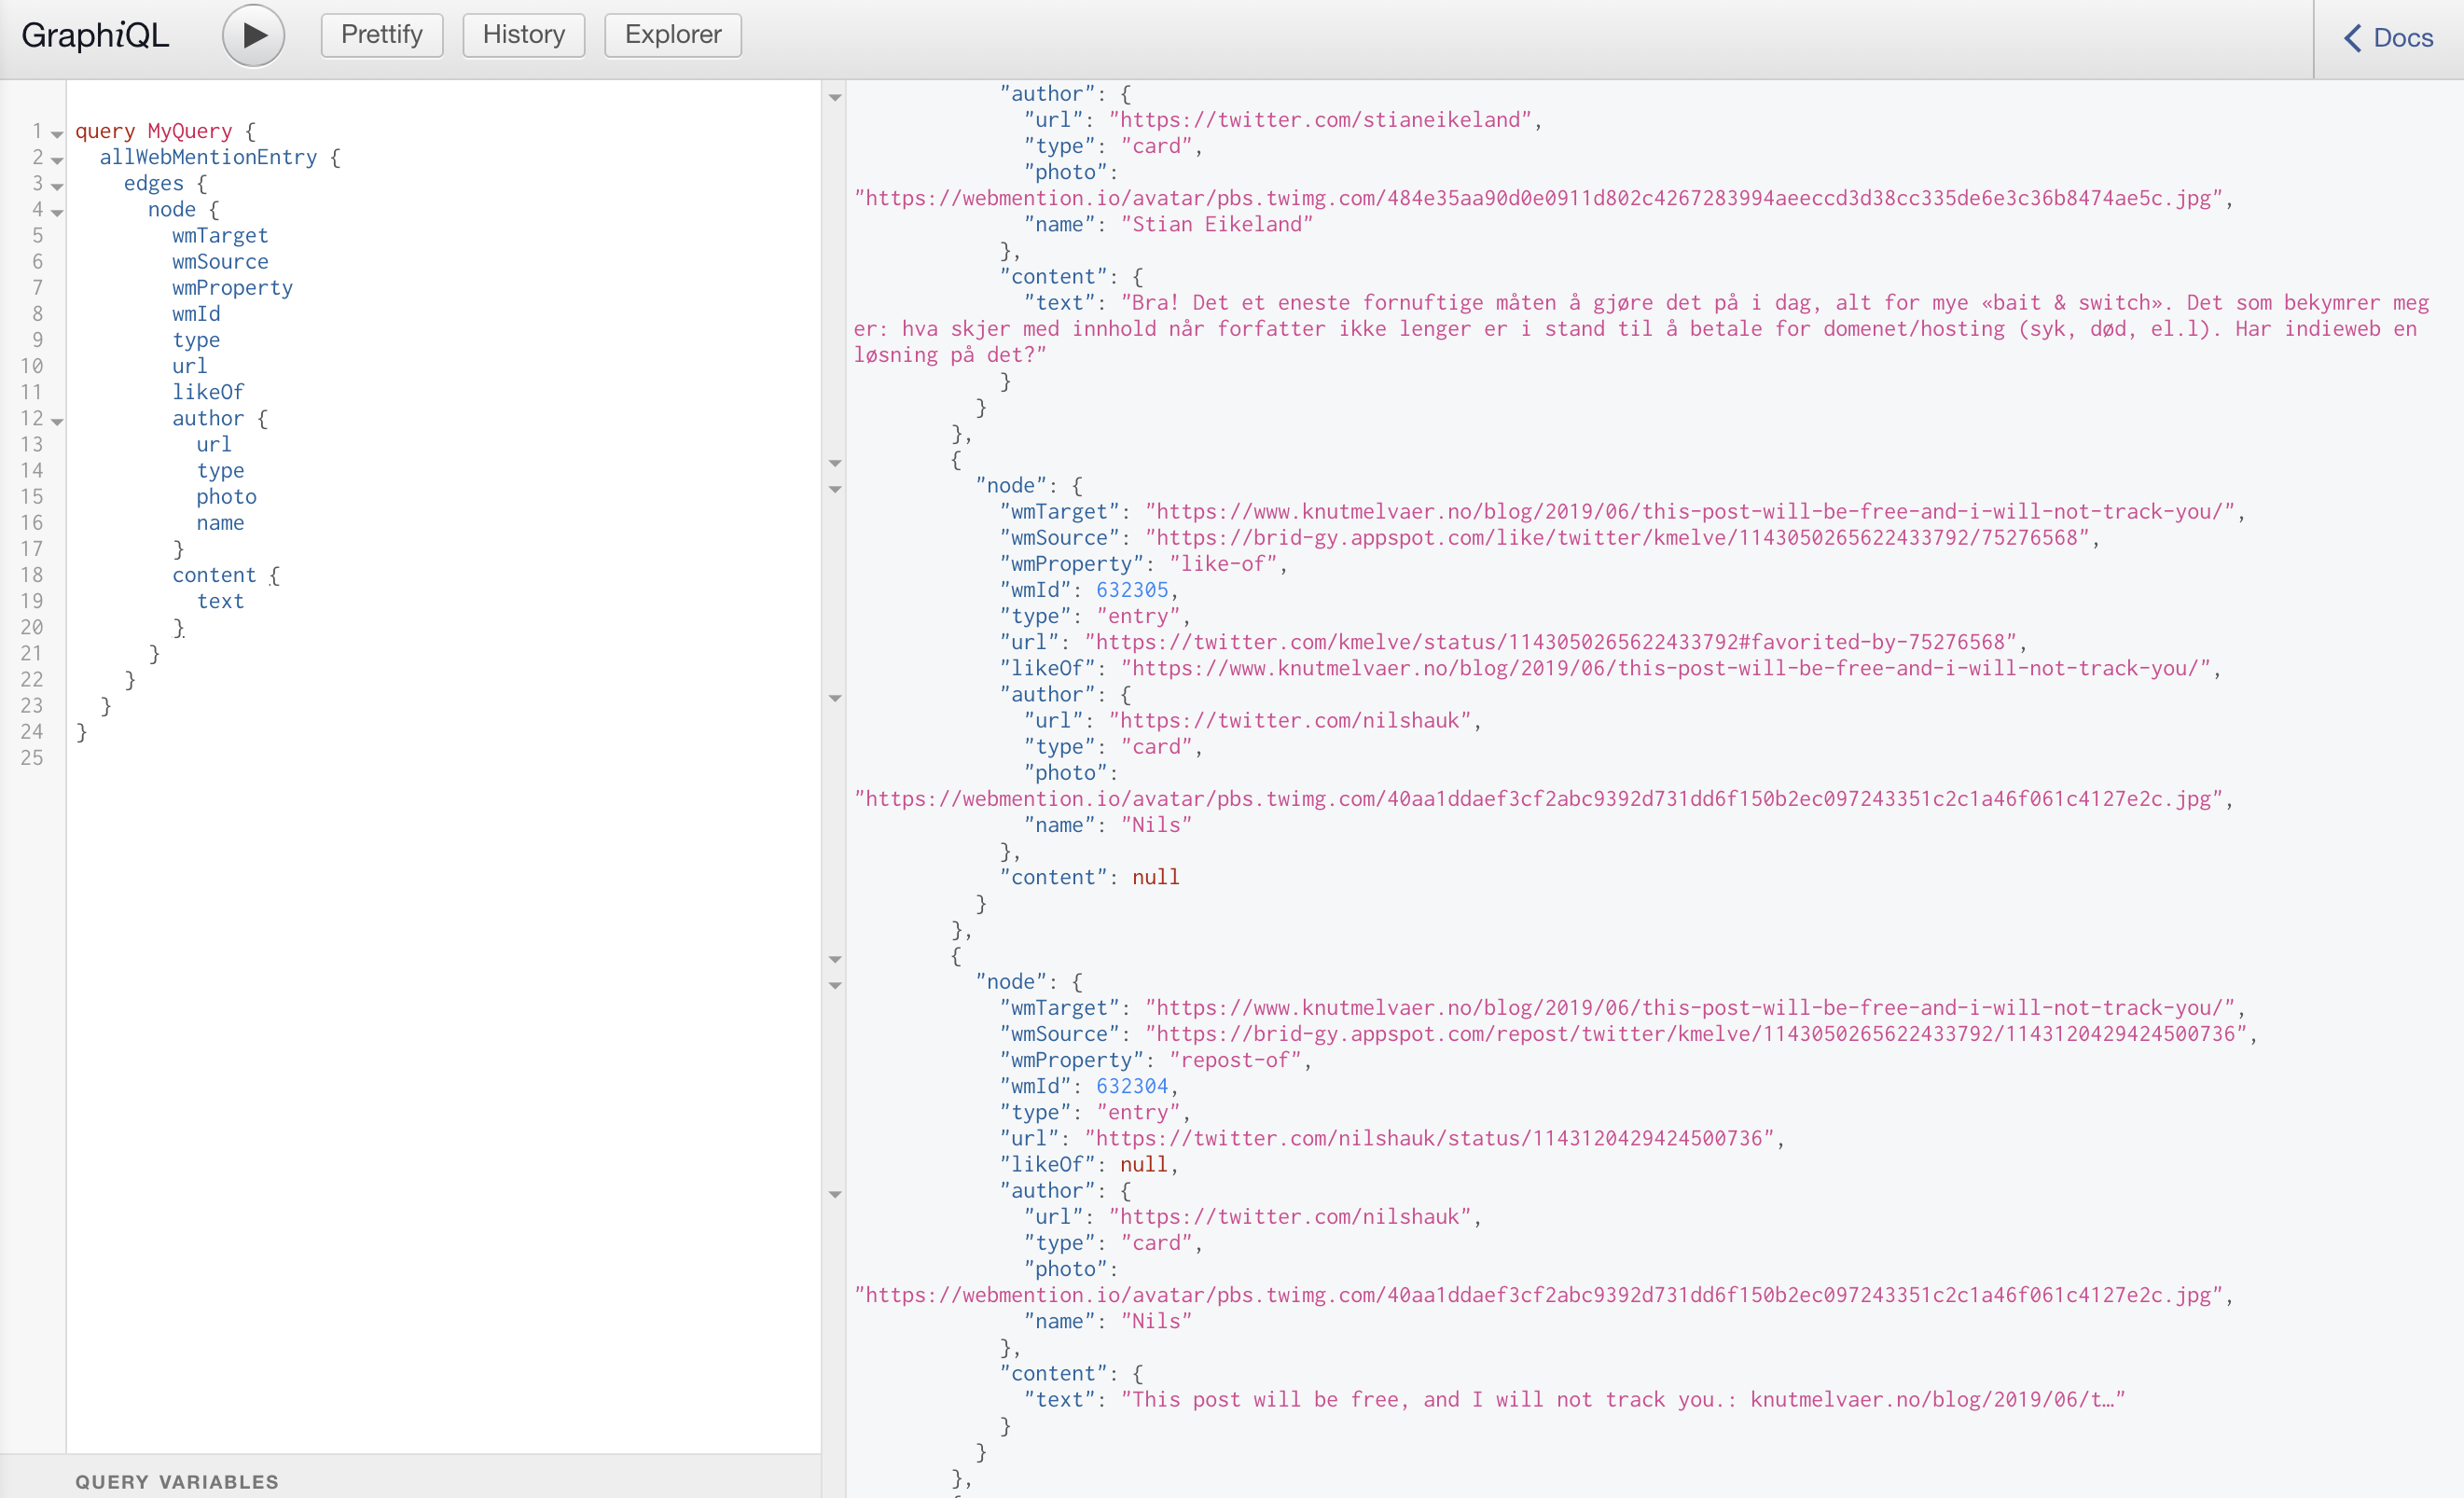
And the GraphQL query:
allWebMentionEntry(filter: {wmTarget: {eq: $permalink}}) {edges {node {wmTargetwmSourcewmPropertywmIdtypeurllikeOfauthor {urltypephotoname}content {text}}}}
The properties of this query will be pretty self-explanatory when you start to get webmentions data. You can use it to list people who have liked, replied, or reposted your post.
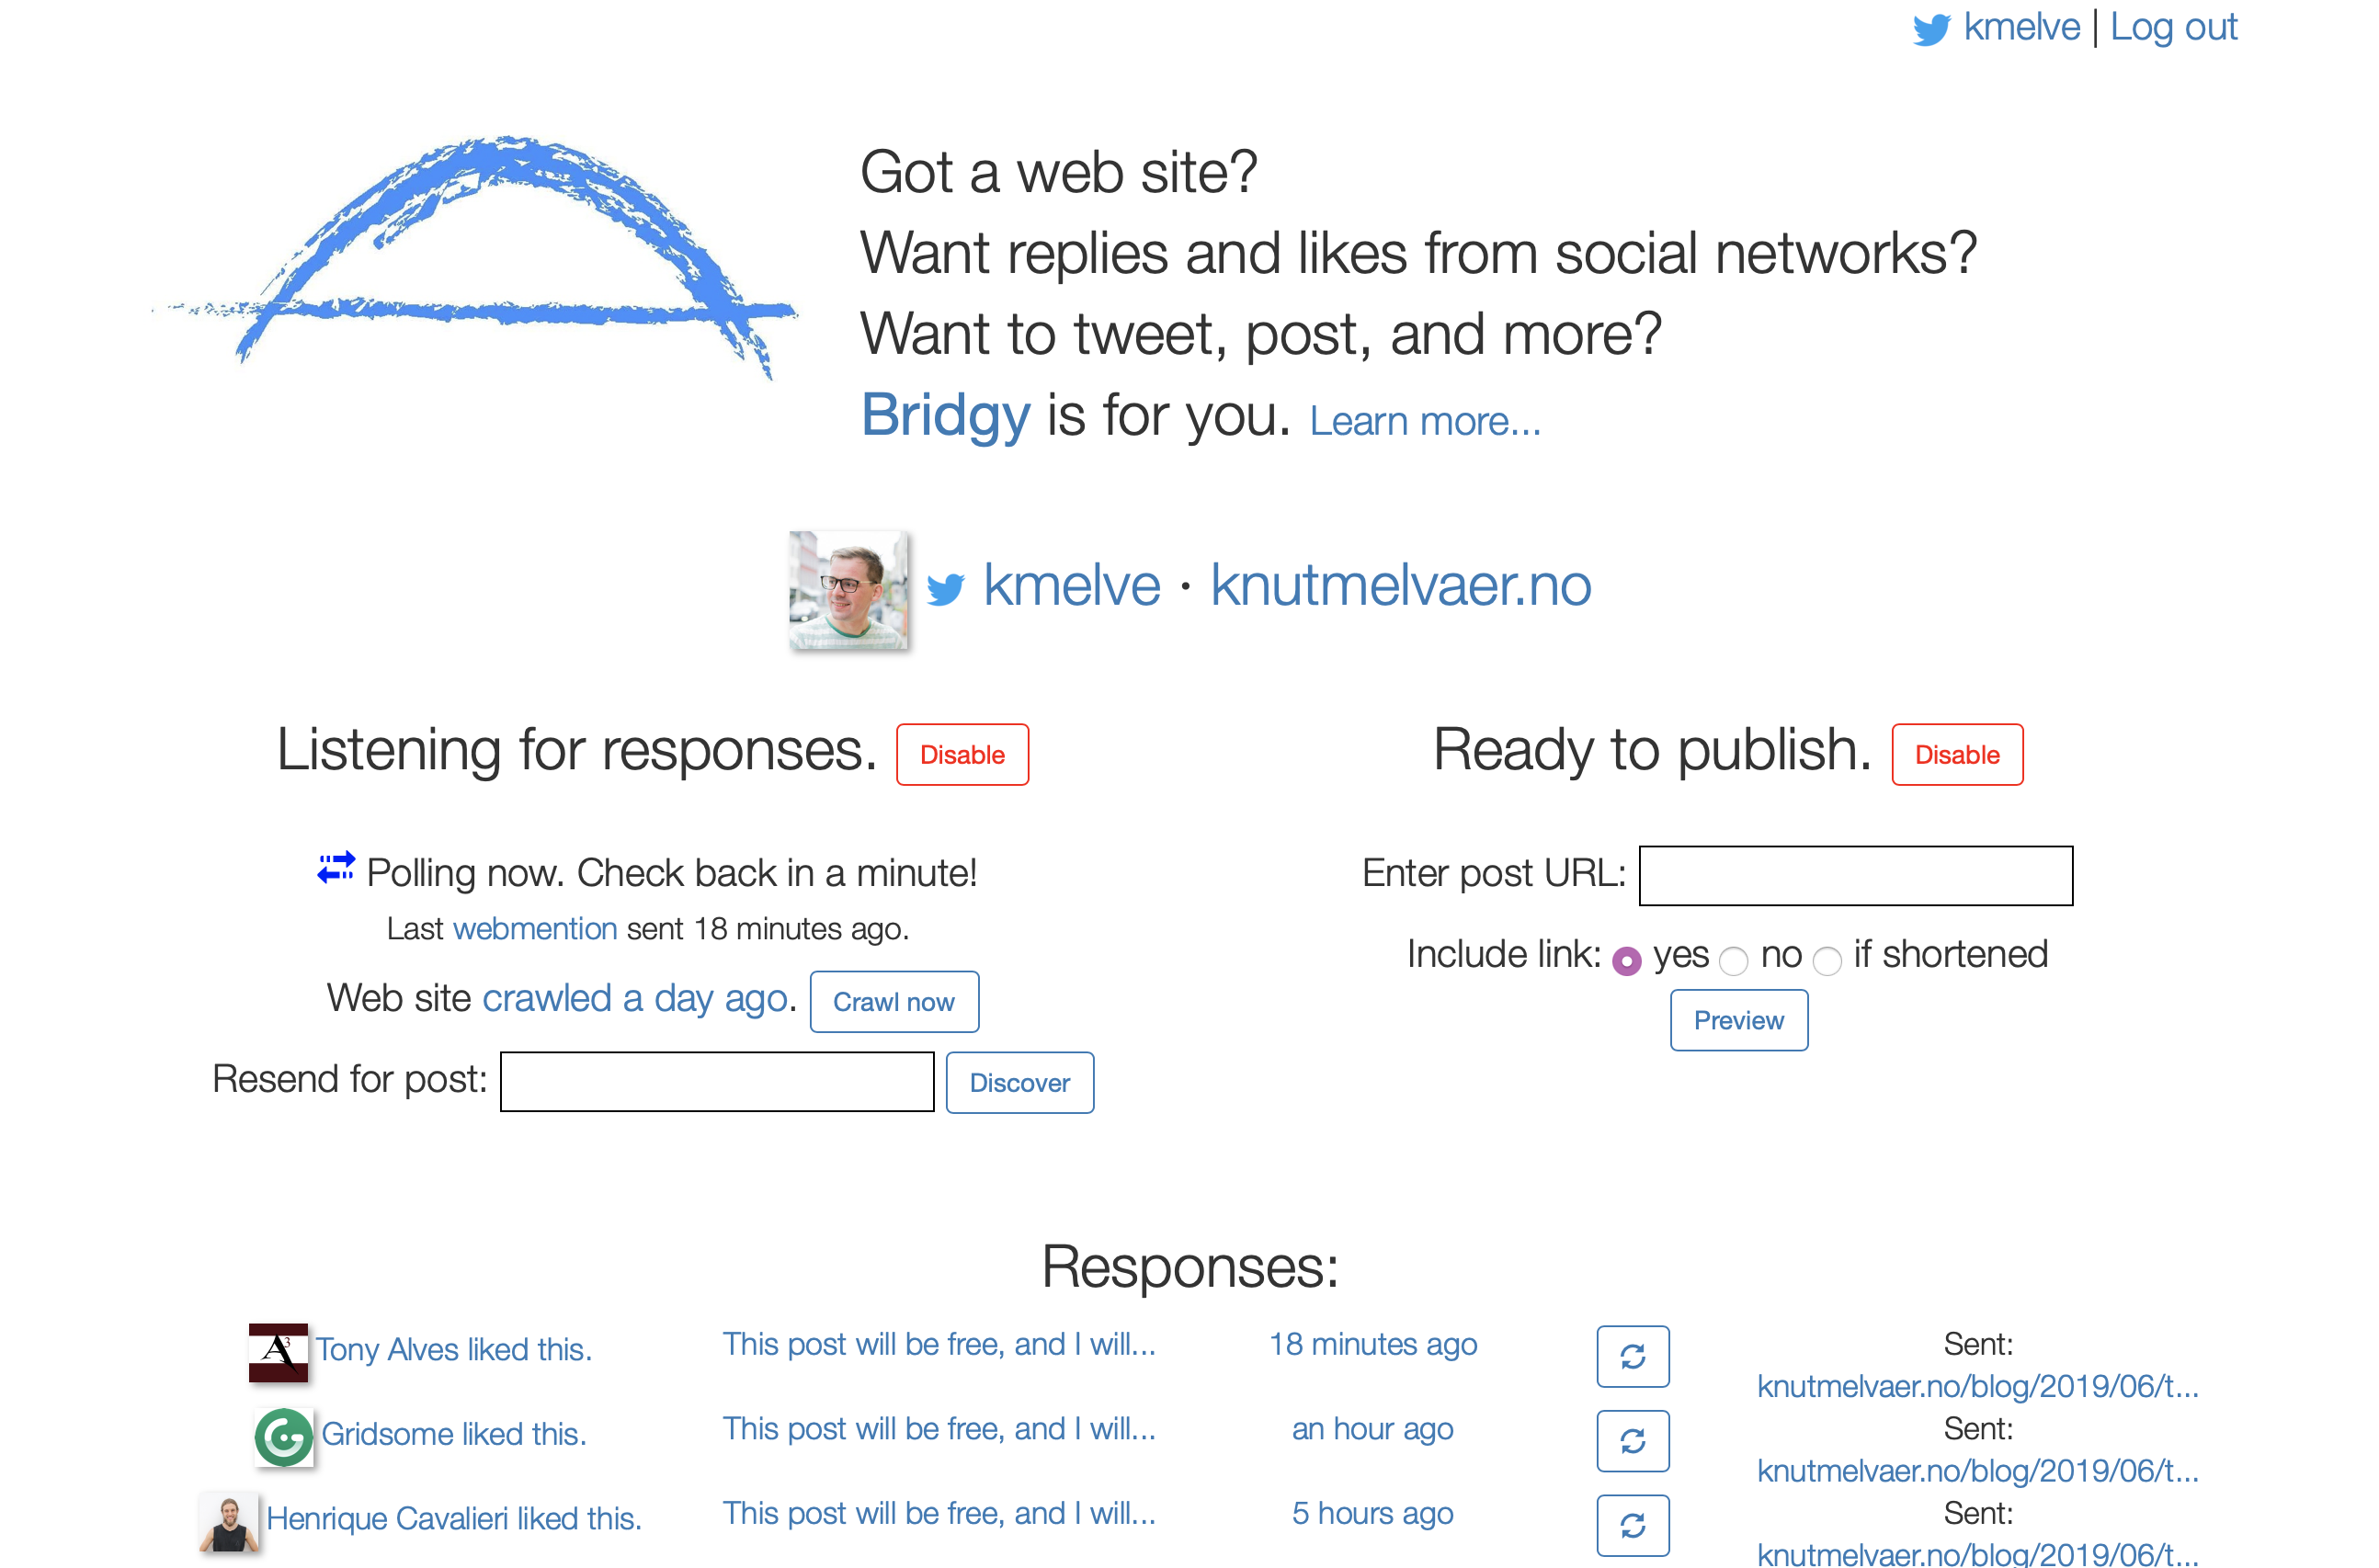
The simplest way to get some webmentions going is to use a service called brid.gy to bring in mentions of your website on Twitter.
Connecting brid.gy
Head over to brid.gy and connect your accounts, I think Twitter makes the most sense, at least at first. Enable the listening for responses. There need to be some tweets that mention your site (by domain name) to there being responses. You can, of course, just tweet your self to get something going.
If you (re)start your Gatsby site in dev mode, you’ll be able to see the same response data in your GraphQL layer. This will make it a bit easier to implement in your frontend template.
Implementing webmentions in your Gatsby frontend
I’m not going to cover much detail here, this is the creative part! It’s pretty much straight forward though. For example, to filter out all the "likes" and show some avatars with links to the "liker", you can do something along these lines (not saying that this is the definitive way to do it):
import React from 'react'export default function WebMentions ({ edges }) {const likes = edges.filter(({ node }) => node.wmProperty === 'like-of')const likeAuthors = likes.map(({ node }) => node.author && { wmId: node.wmId, ...node.author })return (<div><h4><span>{`${likes.length} likes`}</span></h4><div>{likeAuthors.map(author => (<a href={author.url}><img alt={author.name} src={author.photo} key={author.wmId} /></a>))}</div>)}
You can use this component where you query for webmentions, by sending the allWebMentionEntry object into it <WebMentions {...allWebmentionEntry} />.
Triggering a new build on a new mention
If you’re like me, you’re impatient and want new mentions to appear when they happen. If you are patient, you can be satisfied by having the new mentions appear whenever you rebuild your site. But if you host your Gatsby site with let's say Netlify, you can use a build trigger to automatically rebuild the site, querying the newest mentions. First, you’ll have to add a new build trigger on Netlify. Copy this, and head over to the webhooks settings on Webmentions. Paste the Netlify URL into the box (no secret is needed), and hit save. And that’s it! (I realize that we can do some interesting things with this webhook, but we’ll revisit that in a later post.)
I would also recommend setting up some build notifications on Netlify so that you can keep an eye. Especially if you’re actually putting some content from the webmentions on to your site. This would be the time I told you that you can delete webmentions, and add someone to your blocklist if this is needed. Hopefully, it will not though.
Congratulations, you’re now a bit more indie!
There’re still some pieces left to the puzzle. We haven’t set our site to send webmentions or pingbacks yet. And there are more sources than Twitter that we can draw from. I’ll surely return with more fun IndieWeb + Webmentions stuff though. Meanwhile, feel free to reply to me on twitter, or even try webmentioning this post if you have constructive feedback. I’ll happily amend this post and follow up with useful insights.